

On this week's episode of Onboard Lifestyle we finally get to fire up our planar 12v diesel heaters for the first time onboard our custom 435 catamaran SV ba...
Closed Captions (CC):
[Music]
hey guys welcome back do you hear that
that's the hub of our temporary heating
still going
we're on week three of our heating
install yeah
although NGOs defense like he says this
is not the only project that he's doing
so we got a million things to button up
and this is just one of them luckily
it's not as cold right now so yeah he's
kind of off the hook but I really do
want to get this done and completed and
we are almost done I can't wait to get
this fired up yeah so let's see what the
captain's working on because I hear him
down there looks like he is doing
something it's getting there
we're almost done maybe there too one
day one day I'll help okay
how about tomorrow I fire these puppies
up let's do it let's get to work
I'm back at it
another ugly day filter rain all day
today luckily I'm inside ok let's take a
look at what we got going
tanks are out I've marked them out and I
mark these out for a reason
because I have to run some ducting this
used to be my air inlet it is now gonna
be an exhaust it's gonna tie into this
unit here this unit actually goes in
feeds have a state room in here turned
round comes back out will snake around
exit here come around here exit down
here and I'll have two registers one
here and one here so have to rough all
this in right now because when I put
these tanks in I want to be able to
mount the pumps right here right where I
could see them in order to do that I
want to know where all this ducting goes
so let's get that in
okay that gives me a good idea of where
the ducting is going to be these were
all the old holes for the water see
water in seawater out condensation drip
I'm actually cut this out and mount a
grille of this for an air intake for
this cabinet
it's so different when you're living on
your boat and working on it you really
got to keep your work environment clean
because at the end of the day you don't
to be going to bed
and fibreglass dust
[Music]
okay now that a little ventilation into
this cabinet let's I need to still put
the tanks back on but before I do that
let's work on the exhaust there's two
exhaust pipes that come out and they're
to be centered right through these
sleeves and I'm going to pack it around
here with glass insulation to keep any
of that heat transferring out to the
sleeves
[Music]
[Music]
next thing you do is wrap fiberglass
wool
around the exhaust
and then insert this into the sleeve
this will keep it centered
and keep that heat from traveling to the
sleeve
I'll do this from both sides one down
take a look at this everything that's
good
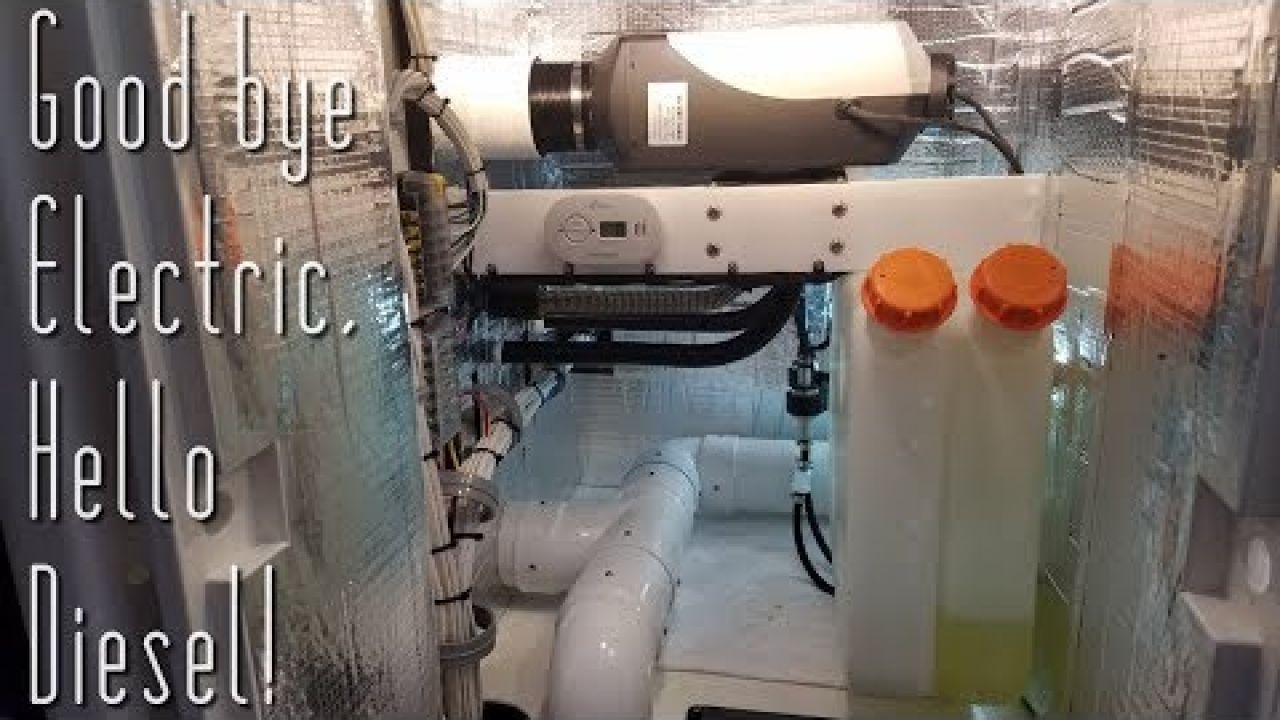
the exhaust in this locker is done it
penetrates through this bulkhead into
that huge Locker from there they'll be
attached to mufflers and then risers
that penetrate to the upper deck
through a chimney so now what's next
well I can mount these but then I think
it's gonna get in my way I still need to
do some work right here so let's do this
next that's where I'm going to mount the
fuel pumps my dad is so crazy
he's cutting those things outside in the
storm
it is ugly cold not too bad just soaking
wet okay okay I just cut this piece
right here I'm gonna mount nuts at you
right there and it gives me a nice
platform for the fuel pumps my a
mounting plate is almost done with the
last pump on
and there we go just like that
now this simply gets mounted right here
so it was hard to get a drill into this
area right here luckily I have a little
flexible drill bit
[Music]
kiss the next thing I'm gonna do is if
these tanks in firmly do that off to
mount this pickup to right in the bottom
of the tank they leave a little flat
spot to drill it in I don't know why
they don't put it in but think about
this
you have to unscrew this beat it all the
way through here through the hole hold
it steady
put the washer on and tighten the nut
well it's like building a ship in a
bottle I have a couple of ideas I'm
going to do this let's see how it works
[Music]
I could do this in one take
I tied a drill bit for weight I could
see it in there drop it out pull this
tight
cut the drill bit off
thread
the pickup tube on here
right about there
and now need the stopper midway through
this line
[Applause]
now let's see if I could pull this into
place and there it is
I work pretty good I like it
cut this off
pull this out
and tighten it up
getting close here this goes in but I
wanted to get my little retainer screws
and all my ducting I'm not gluing this
together because I want to be able to
disassemble this if I needed to I just
need to make it into last connection
here I need to go into that locker and
slide it right in once that's in I have
my last three retainer screws and mount
the tanks can you hear me yep great what
do you want me to do well when ice
you'll see this little see that big
4-inch pipe yeah yeah yeah okay yeah I
do hold on let me get it up well
hold on let me get up there Emma yeah uh
there's a spacer it's underneath a very
back in the back of the locker
underneath of the pipe yeah see that
Oh better well um hold on out okay it
out no it was it yeah there we go
hey push it down yeah okay the spacers
don't say underneath there anymore okay
looks good okay welcome ah how they got
that last connection in
just tie this all in and this ducting is
in for good well I've done as much work
as I can behind the scenes here it's
time to get these tanks in firmly okay
it's getting there I left this little
gap down here little one-inch gap under
everything so be easy to just insert a
little absorbent pad that'll be easy
there it is that way all my field lines
have a little protection underneath them
and I can see if I have any leaks and if
there is it's easy to replace and
diagnose a problem
okay let's see what we got going down
here it's a new day let's get these few
lines in got them all laid out right
here here's the fuel lines that came
with the unit the filters came with a
steel clamps I went and bought new
stainless ones and upgraded to a marine
grade fuel line so these go away I use
all this okay I've got the first one in
get it in and up there fits nicely
right there get those clamps on
next thing I have is a cat a little
length for my fuel filter this gets
plugged in and right on the bottom error
okay here's the last fuel line
connection there's no directions on the
orientation to put these fuel pumps but
I did see on somebody else's video they
suggested tilting them 20 degrees I'm
gonna fire them up see how they do if
they have problems it's real easy to
loosen these two set screws and tilt
them any orientation I want
fuel lines are all in next electrical
got everything set up right here and
staged got my wire my connectors my sub
fuse panel I'm gonna think I'm gonna put
in a light in there as well
here is my carbon monoxide alarms so
let's calculate what we need and get
this thing going
okay to calculate which wire I need I
open my blue C systems circuit wizard I
could calculate wire size if I was to
run both of those units simultaneously
they surged to 6 amps for about a minute
so let's say that the load let's call it
14 let's say just play it safe I know my
feet
and I have to run 15 feet and it surges
for about a minute so let's call it 2
minutes just over calculate this a
little bit and calculate so as I need 12
gauge
there's the wire I need okay to get my
wire
15 feet through this conduit I do have a
messenger tied right here but I don't
need it because when I took the other
unit out
I left that line in here and I just
taped it to the end of this and will
pull it through I will need a little bit
of help though then can you help me for
a second okay your job is just to make
sure it spools off correctly I'm gonna
pull from the nav station make sure that
not gets through the conduit smooth and
I'll just be changing the one ten to
twelve volt correct are you ready yeah
that should do it
hey my job done okay
wires pulled through I'm gonna mount the
sub panel and then actually wire this to
the sub panel that way I could secure
this bundle so it doesn't move and work
from the other side at the main panel
okay now that we've pulled the 12-volt
lead from the heaters over the board
I'll get that wired into my 12-volt
panel here I'll remove that 110 lead
from our old heater air conditioner at
the same time
okay I've killed the 12 volt now it's
time to direct my attention to my new 12
volt lead to the sub panel it goes to
this breaker here so it's just a matter
of prepping the wire and get it in song
like to score just about halfway through
just barely touch the razor type want to
make sure I don't Mar any of the wires
below just give a little bit of a score
I'm gonna pull right off on your mark
okay I have my 12-volt killed right now
but my 110 is switched on the board here
so it's nice to put something
non-conductive over this just in case I
bump into a hot lead over here okay
everything's tied in just gonna need to
put my last connectors on and tie it
into my breaker
it leads in now it's in the off position
I'm gonna order my new label
let's head downstairs and see what's
next well there's only two things left
connect the electrical to the new panel
and start working on the air intakes so
let's do that okay before I get these
air intakes in I want to fill in all
this sound deadening around here well
that was easy
okay the exhaust is here the air inlets
for the burner are up here I have to use
the same ambient air pressure for the
intake that I do for the exhaust that
forces me to go outside the exhaust is
outside so I just punch saved little
time Dez off-camera
punched two more holes through the wall
here epoxy sleeves in and I'll be able
to insert the intakes for the burner now
now it's just a matter of inserting
these in
one
there's to get those clamped and secured
okay it's a little tight but not too bad
okay let's take a look at this exhaust
intake all mounted in place this locker
is about done just the electrical
connections left stuff work to do on the
opposite side in the locker I need to
put air filters on my intakes mufflers
on my exhaust and then go out after the
muffler it's going out the cabin top but
for now I jump on electrical I'll hit
that first thing in the morning still
raining outside
let's get in late okay we're on the
homestretch
are we compass
here's what a guy
I just removed my old thermostat but the
new thermostats are you talking to me
the new thermostats are much smaller and
won't cover up this hole so I've made a
little template here compass calm down
I'm right here I'm literally right here
here play the mid-foot there you go okay
this lays out all the hardware needed to
attach the new thermostats and here's
the little piece that I'm working with
I'll be able to cut this out lay out all
the new holes and attach it here's the
thermostats cute little guys little
mounting hardware and the wire harnesses
most of this will be cut away this huge
lead is the power lead I've put a power
lead right in the cabinet so I'll be
able to cut most of this off along with
their inline box because it is T is
there as well so let's get on this
compass
ah okay I just went outside cut this out
now to do a quick layout and get it
installed
okay got all my cutouts I also cut out
here to match my plate now it's just a
matter of
Manning's on I've hidden all these
fasteners behind there so another one
will show now I'm gonna get the
thermostats just through the hole here
[Applause]
there's one
and to yeah I'm happy with that
okay here's the new thermostats here's
the old one got this door behind our
fusions stereo system and the nice white
of Chase so I just need to remove one
and add two
here's my thermostat plug right here
plugs into here but I need to chase it
under here I didn't have a lot of room
coming up so I just added another access
point right there let's see what that
looks like from below
okay comes out right here I'll be able
to tie it right into this wire chase
here I'm not sure how I'm gonna route it
yet to get over to this will play that
next okay what I want you to do this
plug in this plug see these two I'm
gonna go up top see that hole right
there yeah
feed them up one at a time to me and
then control the lines as they come
through I don't want the wires twisted
okay okay go ahead me the first one just
through the opening I wanted to come
through together though okay now just
kind of feed them so they come through
nice and smooth make sure there's no
noise okay next thing I do is start
controlling these leads get these tied
in right along here
okay
why are you getting tidy thermostats go
up next just tie these power leads into
the sub panel okay we're getting close
now
I need to clean up this mess
here's my old thermostat I've left this
in because I'm gonna use it for a
messenger to pull the new leads through
so that's next pull this through make
the action tuck the wires get this all
buttoned up and thermostats will be done
okay and the grab is a gray wire yeah
now it's tied to this bundle I'm gonna
pull it just pull it nice and slow make
sure it doesn't snag it but snag don't
pull through the part I'll pull back
keep pulling is it feel like it's doing
no feel like it okay something okay
there you go perfect okay keep pulling
keep pulling and there we go thank you
camera thinks tucked in thermostats are
hooked up okay the last connection on
the wire harness was plugging in the
fuel pumps went in nice and smooth
getting close to firing these up Wow it
is ugly outside windy rainy just
miserable but it's about to get cozy in
here because we have power
let's see how everything finished out
here everything's done it's all in put
in a carbon monoxide detector I wired it
in a light it's up here thought it'd be
handy I also got some high-temperature
wrap and put it around the exhaust
anywhere it got close to anything so I
think we're ready to put a little diesel
in here and test these puppies out okay
I just fired it up I can't hear it oh
yeah I can
get here the fan going
you're the pumpkin I ended up wrapping
this entire exhaust port I'm gonna do
that to this one as well I just felt a
little safer that way it's kicking up
getting a little more speed to it let's
close this up see how quiet it's not too
bad you can hear a faint clicking of the
pump but I'm happy that let me see if I
can feel some air coming through this
all right yeah there we go it's working
Merry Christmas to us it feels so nice
now that the heater is finally working
fired up I can actually take off
jacketed sweaters hats I feel good I
want to take this opportunity to take
our patrons and for your support and
words of encouragement you guys leave a
lot to us anyways guys if you liked the
video remember to leave a like and
subscribe if you really like it go check
our patreon page in the links below
come back next week does even number
cool new videos see you then
Onboard Lifestyle ep.43 Diesel Heat On Our Catamaran
Uploaded by:
Onboard Lifestyle
•
Category:
Boat Building/Maintenance/Repair, Instructional
•
Added on
22 December 2018
Description
On this week's episode of Onboard Lifestyle we finally get to fire up our planar 12v diesel heaters for the first time onboard our custom 435 catamaran SV ba...
Closed Captions (CC):
[Music]
hey guys welcome back do you hear that
that's the hub of our temporary heating
still...
Closed Captions (CC):
[Music]
hey guys welcome back do you hear that
that's the hub of our temporary heating
still...